The first thing, of course, is to buy a new seal. A good source is Olcar Bearings and Seals, Southern Pines NC, 910-693-3324 (no web site or email). USA Parts Supply and others sell it too. There are 2 types of pinion seals on 1941-56 Cadillacs, which are unrelated to year or model; some are one type, some are the other. If I remember, the difference is that one has a narrower outside diameter than the other because it is in a “cup” of some kind. Call Olcar for details. To save time, I bought one of each type and returned the one I didn’t use because I couldn’t figure out which one I had before removing the old one.
To take the old one out you have to get the rear of the car well up in the air. It can be done on the ground with jack stands, but it is best over a pit or on a lift. You’ll need a large socket wrench, breaker bar and torque wrench, probably 3/4″ drive, to turn the pinion seal nut. You also need a large pipe wrench or large monkey wrench or some other tool to hold the driveshaft yoke from turning while you turn the nut. With another guy tightly gripping the wrench on the yoke–or you can brace the end of the pipe/monkey wrench against the floor or frame of the car–you remove the nut and then the yoke, and either pry out the seal or use a seal remover to get it out. You drive in the new seal with a large socket and tap the yoke back on.
Now comes the hard and tricky part. You must “pre-load” the bearing behind the seal. To do this you torque the nut to a very high torque rating as per the shop manual. You then measure the load on the bearing by rotating the pinion shaft using the socket and breaker bar, and measure the pounds of “pull” you need on a small spring scale as per the shop manual. You may have to undo the nut and re-torque it to get it right.
Since you have to get the back of the car reasonably high off the ground, need heavy tools, must get the pre-load right and probably a 2nd guy to help, it may be best to have this job done by a professional. I’ve done it three times over the years on 3 different ’49 Cadillacs, including my own. However, each time I was helping friends more skilled than myself who had the right tools and knowledge. The first time was on the ground, the second time was using a pit and the 3rd time was on a lift. The 2nd and 3rd times were, of course, a lot easier.
Author Archives: admin
STOP PLEASE DON’T CHOP THAT CADILLAC OR ARE YOUR DESIGN SKILLS REALLY BETTER THAN HARLEY EARLS
by Art Gardner
I have had ten 1949-56 Cadillac’s over the last 25 years. Some I kept bone stock, one I highly modified, and to several I made minor “tweaks” to improve performance/reliability/safety/convenience. From my experience, I encourage you to consider keeping your ’49 or any other old Cadillac completely stock or very stock — for financial, aesthetic, and enjoyment reasons. Don’t do something you will regret later, as there are many hidden dangers and pitfalls in modifying old Cadillac’s.
To me, the biggest drawback is that most people are not as skilled at car design as the original designers (no surprise there) and the car is likely to end up looking and performing much worse than the original. Secondly, it is often a financial disaster to make big changes to a ’49 or other old Cadillac. Many people start down a path of “customizing” a classic car by chopping the top, frenching the headlights, shaving the door handles and other exterior chrome, adding louvers, replacing the engine with a generic Chevy 350, etc. Most of the time this ends up ruining the car permanently. Do you really think you can make a classic Cadillac more beautiful than did the original designers? Perhaps, but most such modifications rob the car of its intrinsic appeal and make it uglier, not prettier. Sometimes the car does end up looking good. But often not.
I strongly recommend retaining the original drive train, as the 331 Cadillac engine is very, very good – in fact it was at the top of the heap for decades and is just as mechanically reliable as any small block Chevy. Same thing for the our HydraMatic transmission. It is just about bullet-proof. If yours doesn’t work like it should or if it leaks, get it professionally rebuilt and enjoy years of trouble-free automatic shifting.
Without going into all of the gory details, here are my bottom-line recommendations, learned the hard way, for what works well on a 1949 Cadillac:
1. If it came with 6 volts, keep it 6 volts if possible. Pay attention to grounds and the proper cables. Six volts works!
2. If you must improve the electrics, use a 6 volt alternator (keeping the voltage regulator in place for looks).
3. On a ’49, just a “sample” of the current goes through the ammeter, so keep the ammeter as is.
4. Use a better battery (I like the 6v Optima a lot).
5. Add air conditioning if you have to in order to use the car (in which case you would have to convert the car to 12 volts). Otherwise, don’t.
6. Use stainless steel brake lines (to resist internal corrosion) and dual circuit master cylinders for redundant safety. If sticking with a single circuit master, have it sleeved with brass or stainless steel to stop internal corrosion. If you can afford it, have the wheel cylinders sleeved with brass or stainless steel also. Use a remote brake reservoir (you can use parts from a ’54 and later Cadillac) to allow you to check the fluid regularly.
7. Convert your non-functioning clock to a quartz movement.
8. Use an electronic ignition module (e.g., Pertronix) or a dual point distributor plate for better ignition.
9. Keep the exhaust stock, but increase the pipe size slightly to a 2¼ inches diameter for better breathing.
10. Keep the fuel system stock. If vapor lock or engine overheating is a problem, use an electric fuel pump for “go” and keep the mechanical pump just for “show” (remove the rod and route the fuel through the non-working mechanical pump).
11. Avoid adding power steering; but if you must, use a later Cadillac system. Avoid rack and pinion.
12. Use radial tires. If your car doesn’t have power steering, look for radials with a very narrow contact patch (e.g., the Diamondback 700R15) and run the recommended higher inflation air pressure.
13. Keep your stock radio, but have it rebuilt. Rebuilders can add an MP3 input to the radio to play FM and digital music files.
14. Add seat belts, which can be easily done. On 4-door sedans and Series 75 limos, you should add shoulder belts.
15. Install a thicker stabilizer bar up front (like the’49 limos and hearses have) – you will be glad you did and no one will know.
16. Stick with the vacuum wipers if you can. If not, enjoy your electric wipers!
If you follow this advice, you will love using your car and will find that you drive it more and more. Above all, my cardinal rule is that if you feel compelled to change something, please change it in a way that can be undone easily (keep the original parts if you can and make the change a bolt-on operation). In other words, make the change a reversible one! Also, if possible, try to make the change look like it came that way from the factory. For example, if you are replacing the generator with an alternator, don’t use a chrome-plated alternator that will look terribly out of place in a 1949 Cadillac engine bay. Instead, get one that is black or paint it black to fit in with the rest of the engine bay.
In the end, it is your car, not mine, so do what makes you happy. But if you do want to tweak your car some, you will be miles ahead if you learn from my mistakes and triumphs. If you have specific questions about any of this, feel free to contact me
ENGINE PAINT INFO FROM THE CADILL-IKES, THE CLC 1954-56 CHAPTER
Here is the formula number for Cadillac engine dark blue according to paint manufacturers:
• BASF aka R-M: Formula Number 243212. BASF carries this color in 22 varieties of paint. Everything from base coat to single stage and high end to low end paint.
• Dupont: Formula Number BS454. Dupont has a cross over formula that is available in their most popular varieties. The color swatch has been checked and looks correct
It is recommended that the BASF formula be used. R-M (BASF) was a main paint supplier to Cadillac when engines were painted dark blue and it looks like R-M has maintained this color formula until the present time.
HERSHEY REPORT
The annual massive old car flea market and car show known simply as Hershey took place October 10-13. I attended along with a number of other Forty-Niners, including Dennis Akerman, Art Archambeault, Bill Bickle, Prez Joe Cutler, former CLC President Bill Edmunds, Jim Murdoch, Rege McDonough, Jon Schneck and others too numerous to mention.
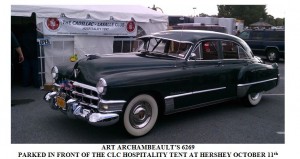
As usual, The Cadillac & LaSalle Club had its Hospitality Tent set up on the appropriately named Chocolate Field, where, after having found that elusive widget for their car, members could slake their thirst, take a load off their tired feet and ease their weary bones into a welcoming chair.
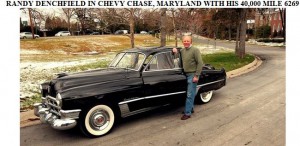
Displayed in front of the tent as an attraction to passers-by was Art Archambeault’s gorgeous Cypress Green Series 62 Sedan. No doubt it was there to tempt non-CLC members to enter the tent and join the club, as well as to serve as a landmark to let members know they had come to the right place. In any case, Art’s 6269 couldn’t be missed.
DEAR MEMBERS
Sad to say, this will be the last issue of the ’49 Times. All 3 of us, Art, Jay and me, have finally reached a point where we must completely retire from this effort. This issue will be the 48th issue of the Times to appear since 2001, during which time we have said quite a bit about our favorite car. Is there more to say about ‘49s? Certainly, but it will have to be with a completely new crew of ’49ers to publish the Times. Meanwhile, this issue features the best selling ’49 Cadillac, Model 6269, the Series 62 4-Door Sedan.
If any current chapter member(s), or anyone else, would like to take over and put out the Times, we would be pleased to assist and get things going, as well as to contribute the occasional article. The mailing list, including details of each member’s car(s) and his/her dues status, is in a simple ancient software package which can be mastered in a minute. The only additional input is to buy address label printer paper that is compatible with your computer’s printer.
Once every 3 months the task of editing the newsletter requires gathering together articles and other material from members as well as writing a few articles oneself, then 2-3 hours of scanning and word processing work. The editor would then take it to his/her favorite print shop (although the current print shop could also be used) and several days later collect the finished folded and stapled copies. The last task is to spend about an hour sticking stamps and address labels on them, and bringing them to the post office. It’s actually fun and you’ll get to know many other ’49 owners, either personally or by phone and email. The only other tasks are to: 1. deal with members’ dues payments and keep the account books we’ll give you, most of which occurs from December to March; and, 2. organize a chapter meeting at CLC Grand National Meets if you are so inclined. If interested, contact any one of us by email as above or by snail mail or phone as per our listings in the CLC directory.
If the Times does not continue, those members who are already paid up for 2013 and beyond will receive a refund in the mail. A spiral-bound soft cover book containing all 48 issues of the Times is available from Jay Friedman, 1530 September Chase, Decatur, Georgia 30033. The cost is $50.00 postpaid within the United States and 50 Euros or 40 British Pounds outside the United States. Jay and I will continue to be the Cadillac & LaSalle Club Technicians for ’49s, ready, willing and able to answer questions on running, repairing and restoring 1949 Cadillacs. (I’m also the CLC tech for ‘48s.)
Keep ‘em rolling!
FORTY NINE 4-DOOR SEDANS IN THE FIFTIES
More than one Forty Niner has some historical family connection to a ’49 Cadillac. Prez Joe Cutler’s Dad bought a Series 62 Club Coupe way back when, which Joe says was the inspiration for his own case of ’49-itis today. ‘49er Curtis Smith of Littleton, Colorado’s grandfather bought a Series 61 4-door in 1953 that Curt still owns. And there are other chapter members who have similar stories about various ’49 models.
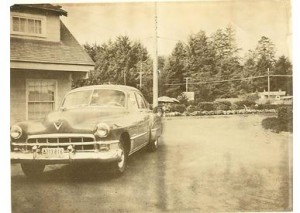
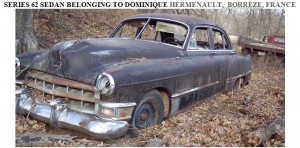
Nonetheless, the best selling ’49 Cadillac was the Series 62 4-door sedan. 37,617 of the 6269s were made, constituting 40% of all ‘49s manufactured, more than twice as many as the next best selling model, the nearly identical Series 61 sedan (of which only 15,738 were made). Not surprisingly, more than one Forty-Niner has a family story about a long-ago-owned 6269. The first is from Alan Towne of Ocean Park, Washington whose grandmother owned a gray Series 62 sedan. It is shown in the photo below, which was taken in 1950 at Seaside, Oregon.
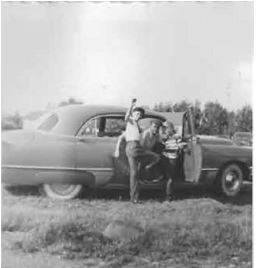
My Dad also owned a Series 62 4-door. He bought it second-hand in 1951, trading in a green 1948 Oldsmobile 98 convertible. (Wish I had that Olds now!). Our 6269 was also gray, identical to Alan’s grandmother’s car, and is shown below.
In the photo, taken on a 1952 vacation trip to the Catskill Mountains of upstate New York, my Dad is seated between my brother and me. We kids thought it was great that our family car was now a prestigious Cadillac, even though it was 2-years old.
Unfortunately, not long after the picture was taken, our family ‘49 came to an untimely end. We lived in New York City and one day my father parked it on a steep hill in the Bronx. I don’t know what he failed to do–either the Hydramatic wasn’t in “R” or the hand brake wasn’t set, or both–but after he locked the doors it rolled down the hill and self-destructed against some immoveable object. Fortunately, no people were around and there was no other damage. Following that episode my Dad stuck with Oldsmobiles.
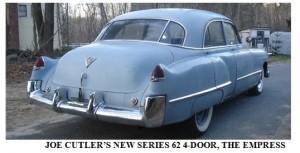
ANOTHER 6269
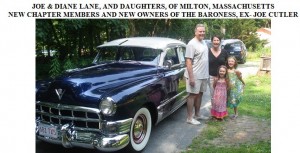
[Ed. Note: Following the sale of his gorgeous 4-door, the Baroness, Prez Joe Cutler has been continuing the resurrection of his newly acquired 37,000 mile, original 6269 sedan from Colorado, The Empress.]
Joe writes: “We wet sanded the recently re-painted hood, firewall and dashboard with 2000 grit and buffed out the pieces. I masked off the hood & freshened up the under-carriage with new undercoating. My glass man swung by and installed the brand-new driver’s side windshield, and my auto body man helped me re-install the hood. Lookin’ great!
I also re-wired the back-up lights–they work perfectly—and eliminated the electric fuel pump the previous owner installed so the car will run off the original rebuilt mechanical pump.
Now for the bad news. (I thought things were going too well so far!) While running the engine and getting ready to time it, I (thank God) happened to notice the reflection of light off something shiny on the garage floor. I looked underneath the car and discovered, much to my surprise and horror, a massive puddle of fresh oil under the rear parts of the engine! I thought the rear main seal let go, as over a quart of oil was pumped out onto the floor in a matter of minutes. Luckily it turned out to only be a loose fitting where the oil pressure gauge tube screws into the upper rear of the motor, which was a great relief. Just another obstacle to overcome, and there’s been loads of those this year with all the cars! The car now runs like a Swiss watch! Here’s a recent photo
REMOVING AND REPLACING A 49 CADILLAC CYLINDER HEAD
Some months ago the cylinder heads of my ‘49’s motor needed rebuilding, so I removed them and took them to a machine shop for repair. Taking off the cylinder heads with the motor in the car is not particularly difficult technically and the only special tool needed is a torque wrench. On the other hand, there are lots of parts to remove (and later re-install) and the heads are heavy, weighing more than 50 pounds each, so it can be a 2-person job.
The first task is to completely drain the coolant from the radiator and engine block. To do this, first raise the front of the car on jack stands. The motor has 2 small drain outlets on either side of the middle of the block, just above the oil pan. The Cadillac factory closed these off with small pipe plugs, which when removed usually results in the coolant flowing out in the wrong direction and making a mess. I replaced mine with drain cocks identical with the radiator drain cock, so I can put a rubber hose on each to direct the flow into buckets. While you are under the car, remove the oil dipstick tube and dipstick. Back on top, after lowering the car, unfasten one of the battery cables and remove the windshield washer bottle and bracket.
Next, remove the rubber fuel line. Then, drain the oil filter if you have one. Now, disconnect the upper and lower oil filter tubes at the oil filter end, leaving the tubes attached to the motor, and remove the oil filter. Unfasten the 4 bolts holding the thermostat housing to the water pump. Loosen the upper radiator hose clamp, turn the upper hose on the radiator outlet one quarter to one half turn to free the thermostat housing and remove the hose and the thermostat housing as a unit. Remove the fan belt, the fan and the generator along with its adjusting strap. Remove the lower radiator hose. Now the radiator and water pump can be unbolted and removed. I find it’s easier for 2 people to lift the radiator.
The next task is to remove the intake manifold. First, remove the air cleaner. Next, remove the accelerator linkage spring and unhook the accelerator linkage from the carburetor. Fold the accelerator linkage back against the firewall and hook it under one of the hoses or wires on the firewall. Disconnect the Hydramatic “kickdown” rod at the carburetor and transmission ends and remove it from the car. Disconnect the vacuum advance tube at both ends and remove it. Disconnect the manifold vacuum tube at the fuel pump end. Disconnect the automatic choke tube at both ends and remove it from the car.
Disconnect all wires from the coil (back-up light wire, coil power wire, coil to distributor primary and secondary wires) and tie them back to a hose or wire at the firewall. Disconnect the fuel pump to carburetor tube at the carburetor end. Tilt it up to a sufficient angle on the fuel pump that fuel doesn’t flow out but leave it in place. Loosen and remove the four bolts and four nuts with their washers that hold the intake manifold to the cylinder heads. Now the manifold can be removed with the manifold-to-fuel pump vacuum tube, carburetor and coil still attached. One person can lift it, it may be easier if you are two people.
Now the heads are almost ready to remove. Starting with the driver’s side head, unthread the spark plug cables from the loops on the valve cover on a late motor, or unfasten the spark plug wire conduits on an early motor, and tie them up to a hose or wire on the firewall. Remove the valve cover and set it aside. Remove the water hose that runs between the head and the defroster assembly. (I find it easiest to cut this hose, as it is hard to get a good grip to pull it off.) Unscrew the cylinder head ground strap at the firewall end. Now, unscrew the cylinder head bolts. Since the rocker arm assembly is full of oil, before removing it get a pan or other receptacle longer than the rocker arm assembly. With the pan ready to catch any oil, lift off the rocker arm assembly with its four bolts and set aside on the pan.
Remove the push rods. You must re-install the push rods with the same end toward the rocker arms and, preferably, in the same valve lifter. Note the shape of the push rod at each end. Punch holes in a piece of card board, number the holes with a pen or pencil and, to keep them organized, insert the push rods into the holes in numerical order with their top ends up.
Remove the 6 exhaust manifold bolts. Leave the exhaust manifold in place, since the crossover pipe is very rigid and will easily support the exhaust manifold after the head is removed.
Getting the passenger’s side head ready is similar. Unscrew the nut holding the wire to the water temperature sending unit. The voltage regulator can be left in place, but you risk banging the head into it. I usually unscrew the voltage regulator mounting screws and lay the regulator with its wires still attached on the nearby shock absorber with a rag underneath it. Deal with everything else in the same manner as the driver’s side head. The crossover pipe and exhaust pipe are very rigid and will support the exhaust manifold easily after the head is removed.
Before lifting off the heads, it’s a good idea to put some towels or other protection on the fenders and on the baffle in front of the radiator. If a head is stuck, tap it with a hard rubber hammer to dislodge it. You can grab the head by the water pump hole at one end and either the heater pipe, temp gauge sending unit or the ground strap at the other end. An assistant’s help can be useful at this point. Alternatively, you could use a “cylinder head lifting tool”, which are T-shaped tools that screw into the spark plug holes. You then pick up the head by the “T” crossbar. I have two I’ll lend to anyone who needs them. On the bench, remove the driver’s side head heater hose pipe, the passenger’s side head temperature gauge sending unit, both ground straps and the small pipe plugs at the rear of the passenger’s head and the front of the driver’s head.
Have your heads rebuilt in a reputable shop. It’s a good idea to have the re-builder install hardened steel exhaust valve seats so the engine can better cope with unleaded fuel.
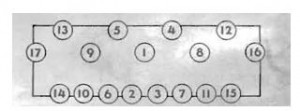
Re-install everything in reverse order. Head gaskets will say “TOP” on one side, so lay new ones thusly on the block with the guide studs engaged. Carefully lay the heads on the block, engaging the guide studs underneath it and ensuring that the gasket is not folded back or kinked. Torque the head bolts to 65-70 foot pounds in the order shown on the next page:
Re-install everything else using new gaskets. Be sure to put a bit of oil at both ends of the push rods. To make their installation easier, lightly cement new water pump gaskets to the front of the pump after scraping off the old gaskets. To facilitate exhaust manifold gasket installation, use a pry bar or large screwdriver to slightly pry the manifolds away from the head. Don’t install the intake manifold until all cylinder head bolts are torqued. Intake and exhaust manifold bolts and water pump bolts should be torqued to 25-30 foot-pounds.
FOG PARKING LIGHT HOUSING TO FENDER GASKET
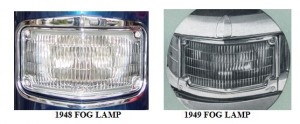
When our ‘48s and ‘49s were new there was a gasket between the perimeter of the front of the fog light or parking light assembly and the back of the opening in the fender where it mounts. This was the subject of a lively discussion on the CLC online Forum a couple of months ago. It seems the gaskets frequently become so worn with time that they not only disappear but have been largely lost to our collective memory. A well known Cadillac parts vendor even stated that he was unaware of the gasket. Bill Bickle wrote, “No one beyond a select few chapter members appear to know about this anomaly. Jeff Maltby appears to have a set but he is the only one.”
The Cadillac Master Parts List, the ultimate arbiter, shows that the gasket indeed exists. It’s the “Fog Lamp Opening Rubber Gasket, group number 10.0085, part number 145 4917 for ‘49s and 145 2989 for ‘48s. Prez Joe Cutler writes that “I’ve scraped off melted remnants of said gaskets from original fog light housings during my restorations. The gaskets prevent junk thrown up by the front wheels from ‘seeping’ through the gap between the housings and inside of the fender. I also believe they act as a ‘cushion’ to help eliminate squeaks and other objectionable noises that could otherwise occur.” Since the gaskets are not being reproduced, Joe adds that “What I use, that is inexpensive and effective, is a simple roll of foam weather-strip with one self-adhesive side, such as used around door openings in a home. I buy the largest size possible–I think it’s ¾ x ¾ of an inch (19 mm.). I’ve found it works quite well and no one will see it anyway once the fog light units are re-installed.”
1948 FOG LAMP 1949 FOG LAMP
Editor Art Gardner writes that to make this gasket “I used a flat, rectangular roll of foam rubber that I bought at Home Depot. I think it was about ½ an inch (12 mm.) thick by about ¾ of an inch wide. I may have doubled it on the ends of the housing, but I forget exactly. It worked pretty well. The seal is skinnier in the middle and fatter on the ends. I tried to find the real stuff, but no one makes or sells it. I bought wrong items twice. I also talked to Steele Rubber about it and never could understand why they wouldn’t make it. I guess they are hoping to develop some pent up demand and then make one big batch, so I finally gave up. Steele once told me that to make the seal, they needed an original to use as a pattern, but all of the originals I have seen have been disintegrated garbage and were not usable as a pattern. But Jeff Maltby’s gaskets look good enough to be used as a pattern, so maybe he could lend them one to allow them to make these parts for the first time.” Art reports that Steele supposedly is working on making this item using Jeff’s good set of gaskets as a pattern. Let’s hope so!
THOSE 6 VOLT BLUES
Scenario: You’ve just pulled into the local Cruise Night with your freshly-polished and detailed pride and joy. She’s “lookin’ good,” and a crowd of admirers quickly assemble to get a closer look and hear all about your gem on wheels. You proudly field onlookers’ questions and, of course, someone wants to “hear her run”. Having already exclaimed that “she purrs like a kitten,” you slide behind the wheel and turn the key, expecting the engine to instantly spring to life. Instead, you’re greeted with a sickening, groaning noise as the engine laboriously turns over and the battery goes flatter than the lens on the Hubbel Space Telescope. The crowd quickly dissipates and walks away shaking their heads, leaving you sitting there quite embarrassed, wondering what happened!
The following may seem elementary, and many of you may already know all about it, but I never cease to be amazed at the number of phone calls I receive from owners of older cars with 6 volt systems who are experiencing similar starting problems and are stymied as to the solution to their woes. American cars and trucks didn’t switch over to 12 Volt systems until the mid-1950’s. Far too many owners of vehicles with the original 6 volt systems who experience starting problems in desperation convert, or attempt to convert, their vehicle to 12 Volts using special batteries or 6/12 Volt “converter” units, some resembling Rube Goldberg inventions, with mixed results, rather than getting to the heart of the problem! My contention is, and always has been, “If they started back then, they should start now!” However, that’s true only if everything related to the starting system is in top condition.
I experienced this problem firsthand when I recently bought a 1949 Cadillac limousine. The previous owner complained that the car would never start once the engine warmed up, so he had some enterprising “mechanic” install a 6/12 Volt “converter” that would supposedly “fix the problem”. I guess it may have worked for awhile – until the owner pulled the car into his garage one day and noticed smoke billowing from the engine compartment. Yep, he had a wiring fire! After emptying a fire extinguisher on the melted mess, he became disgusted with the car and decided to sell it.
Once I got the car home I went to work. I discovered the converter mounted on the inner fender well with a myriad of narrow gauge wires going everywhere, most of which had fused together during the fire. I first eliminated this converter and deposited it where it belonged – in the scrap metal pile. I then cut back and disposed of all non-original wiring and proceeded to solder in new, proper gauge wires. I removed the starter and brought it to a local re-builder, who informed me the armature was junk. I had a few extra parts and a new solenoid, so he was able to put together a starter, which now functioned as it should.
Then I found that someone had installed a light gauge positive battery cable. I had a new one custom-made at R.I. Wiring Service in the heaviest gauge they offered – ONE GAUGE. Finally, I removed the negative ground strap and cleaned it, including all points at which it was connected – starter bolt, frame, and the battery terminal itself. I then cleaned the end of the starter where it bolts to the bell-housing, and the bell-housing itself, and installed the rebuilt starter. I bought a heavy-duty 6 volt battery with a minimum of 650 cold cranking amps and installed it. VOILA! The engine now “whips over” and starts like new, no matter how hot the engine!
In summary, here are some things to check/remedy if you experience hard starting on your 6 Volt vehicle:
1. Condition of the engine itself. The engine must have at least decent compression. Check the condition of electrical components like ignition points, condenser, rotor, distributor cap, spark plug wires, spark plugs, engine timing, condition of the carburetor, and proper carburetor adjustments.
2. Check the condition of the starter motor. Worn brushes, armature or solenoid, and worn end bushings can all cause problems.
3. CLEAN all electrical connections, including battery terminals, battery posts, and all points where battery cables attach to the starter and frame. Don’t forget to clean any rust and/or paint from the starter and the bellhousing where the starter bolts!
4. Buy the heaviest-duty battery available. A minimum of 650 cold cranking amps is recommended.
5. Install the heaviest gauge positive battery cable possible, such as #1 gauge as previously outlined. Be sure to install a cable of the PROPER LENGTH! Too long a cable could result in current/voltage “drop”, which will adversely affect the starting system.
If all of the above is observed, your pride and joy should spring to life upon demand each and every time!
