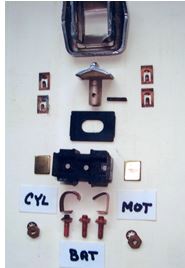
This is what I do to repair the Hydro Electric Window Switches when they start to act up. A lot of time, the nylon rod breaks from age and use. This makes the switches sloppy and prone to poor contact. This angers the driver when the windows sometimes fail to go up, or sometimes fail to go down. Removing the switch for the car is not terribly difficult – just be sure to mark the wires so you know where they go. If the wiring is original, be careful about handling it or you may have to use shrink wrap insulation if the cloth insulation comes off.
The pictures show the refurbishment of a 1953 Cadillac 4-gang switch, but the 1949 switch is the same as in all functional respects; only the chrome is a little different. Picture A shows a 4-gang switch disassembled. The orange wire or rod is weed wacker line, .095” in diameter. I have also used the tip off a broken fly rod instead, but finding broken fly rods is not easy!
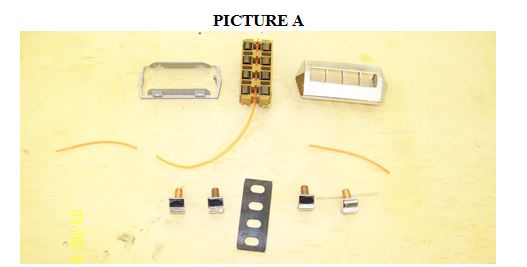
PICTURE A
The most difficult part of disassembly is getting the spring clip/lock off (Picture A, top left) without damaging it or the housing. But if one is patient, one can get the two spring clips out of their holes and slide it off. Then everything just falls apart.
Picture B shows the toggles from two different perspectives, one with a nylon rod through it and three oriented to show the holes in the toggles for the nylon rod. It goes through all 4 toggles and holds them in place and ensures good contact on the spring surfaces. Both ends of the original nylon rod are tapered, but the weed wacker line will fit fine without the taper. If you have trouble threading it in, you could taper one end of the replacement line (rod) with a little sandpaper. These toggles are original to a 1949 Cadillac.
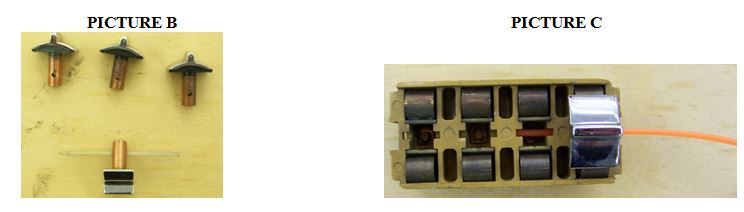
PICTURE B PICTURE C
Picture C shows the base unit with one toggle installed and the orange nylon line partially installed. It takes a little patience to install the line, but really it is not that bad of a job. Red wine is a great shop assistant!
While you have the switch assembly apart, now is a good time to clean and polish things. Take time to clean up the housing. Also, take the springs out and polish them for better electrical contact. I generally clean them up just in case. A dab of dielectric grease might be used to maintain good electrical contact and avoid corrosion down the road.
When you get the toggles installed and the rod threaded the spring clip fits over the hole where the rod goes through. The clips hold the rod in place. Once done the switch toggles will be nice and tight and work a lot better.